The feature can publish and schedule posts to the Instagram news feed on behalf of your Instagram account. It can publish and schedule images and video posts.
Instagram is a big platform to do the marketing of your products. Therefore, you need to publish posts on Instagram regularly. Sometimes you need to schedule your posts to best connect with their audiences.
The Instagram poster will lift the heavy burden for you. The feature itself will publish posts regularly on your behalf. It can also publish scheduled posts.
You have to create campaigns on the QuilChat Instagram Poster interface. After you have made a campaign, the feature will take full responsibility for publishing posts.
How to create a campaign to publish and schedule posts:
First, to create a campaign, click on the ‘Instagram Posting’ option at the dashboard’s left sidebar. Straightaway, a page will appear. Now click on the ‘Create new post’ at the top of the page, and a form will appear.
You have to fill out the form to create the campaign.
How to fill out the form:
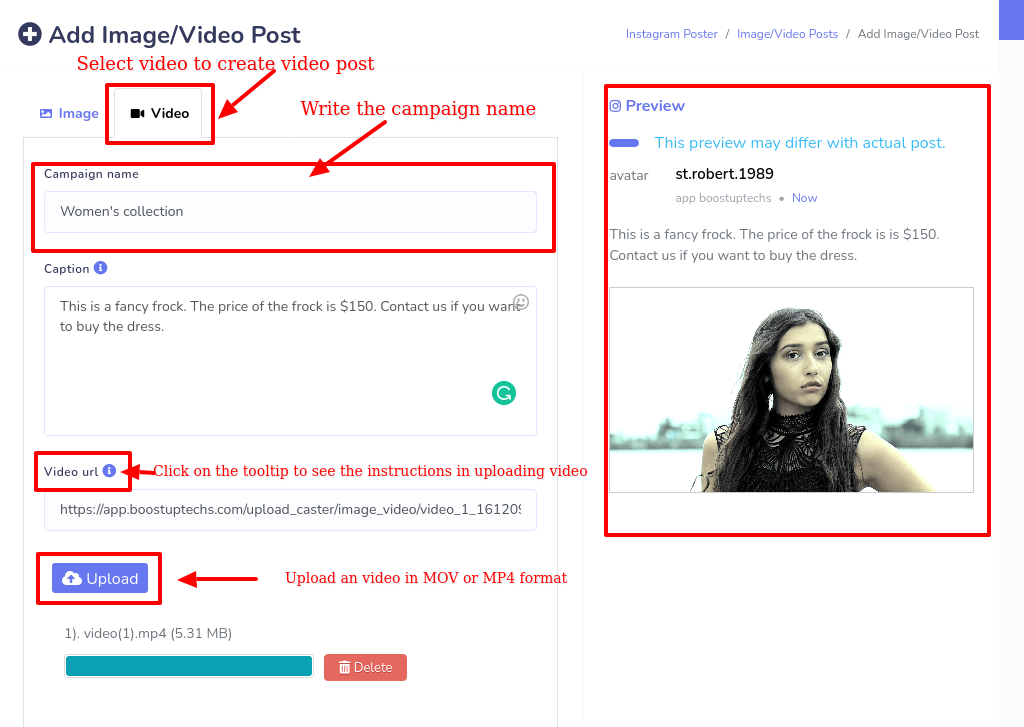
At the top of the form, you will see two options— image and video. Select image to create a campaign for image post and select video to create a video post campaign.
Write campaign name in the campaign name box. Then write a caption for the post in the caption box—the caption support spintext. Click on the tooltip to see how spintext works.
As for the image post, you have to upload an image of JPG formate. The feature supports only the JPG format of the image. Click on the tooltip on the image URL field to see the full instruction on supported formate.
To upload an image, click on the upload button under the image URL field. Just as the image is uploaded, you will see the URL of the image in the box. Moreover, you will see the preview of the post on the right side of the form.
Click on the ‘Post to Instagram account’ field to select an Instagram account. Just as you click, a list of your imported accounts will appear in a dropdown list. Now select accounts from the list— you can select multiple accounts.
Then you will see the posting time option. If you want to publish the post now, turn on the radio button called to post now.
On the other hand, if you want to schedule the post, turn off the radio button, and without delay, a few more fields will appear. To make a scheduled post, you have to fill out these fields.
The moment you click on the schedule time field, a date-time calendar will appear. From the calendar, select a date and time when you schedule the post.
Now click on the timezone box to select a timezone. Instantly a drop-down list of different timezone will appear. You have to select your timezone from the list.
Now add a number in the Repost this post box to set how many times the post will repost.
Then you have to select the time interval. Click on the time interval box, and a pop-up list of different time frames will appear. Select a time frame from the pop-up lists.
Now click on the Create campaign.

If you want to publish and schedule video posts, you have to select video at the top of the form and upload a video.
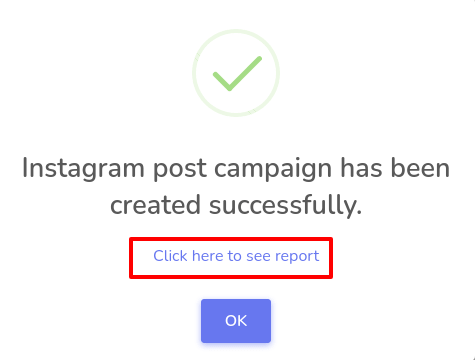
If you have filled out the form properly, you will see a successful message on a pop-up box that the Instagram post-campaign has been created successfully.
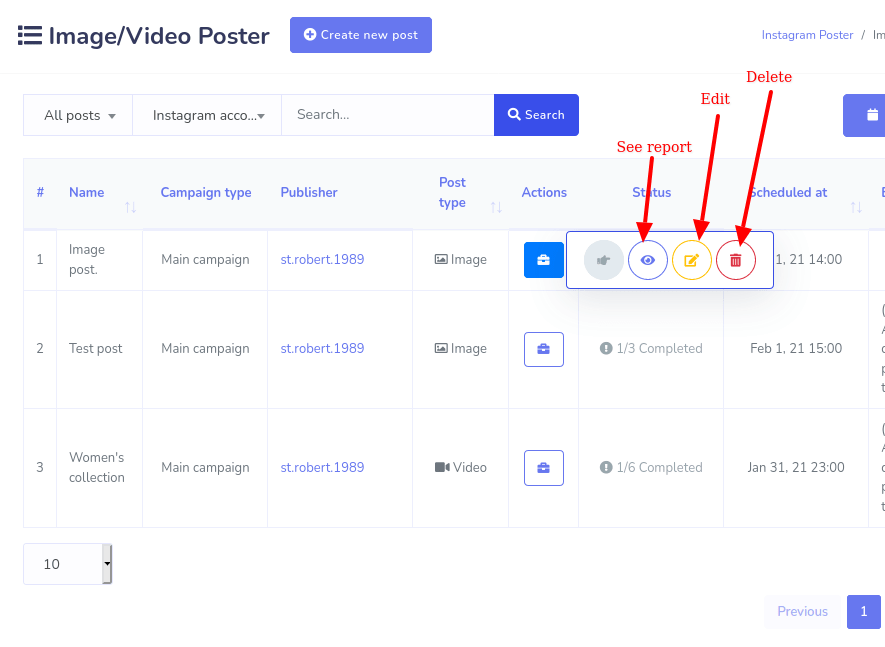
To see the campaign’s report, click on the ‘Click here to see the report option.’ Instantly, you will go back to the page where you will see all the campaigns listed.
By clicking on the action button of a campaign, you can see the campaign’s report, edit the campaign and delete the campaign.
Thank you for reading the article. If you are looking for the best Instagram Automation tool, then QuilChat comes in handy and simple to use.